There are three places you can download Physics arsenal from:
- Github
- The asset store tab within the Godot Engine
- The Godot Asset Store page
Physics Arsenal is free with an MIT License no matter where you download it. This guide covers installing Physics Arsenal from within the Godot Editor. Note: The .NET build of Godot is required to use Physics Arsenal, as it was programmed in C#. However, projects made in the non .NET build of Godot can be opened in the .NET build. The only difference between these two builds of Godot is that the .NET build supports C#. Otherwise they are functionally identitcal. Why C-Sharp?
Downloading Assets
First, click on the “Asset Store” button at the top of the Godot editor, and search for “Physics Arsenal.” Once the results load, click on “Physics Arsenal.”
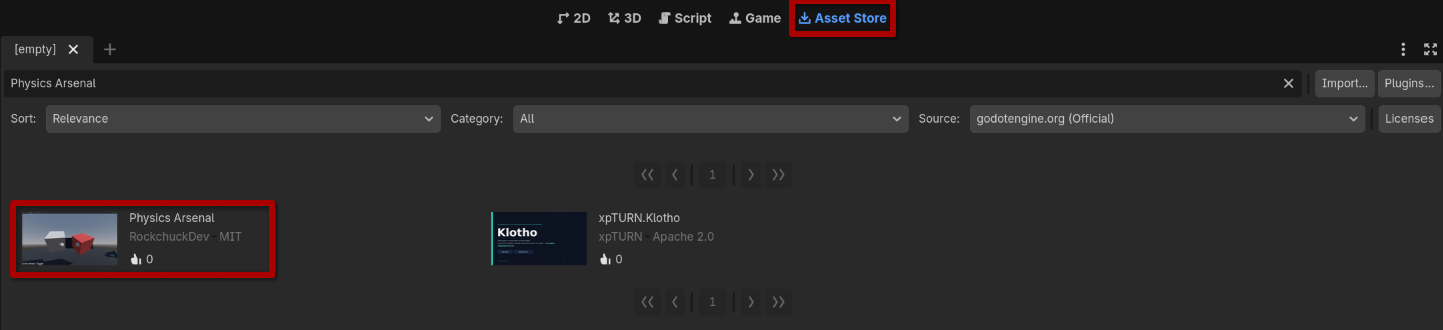
Then click “download” at bottom of the window that opens.
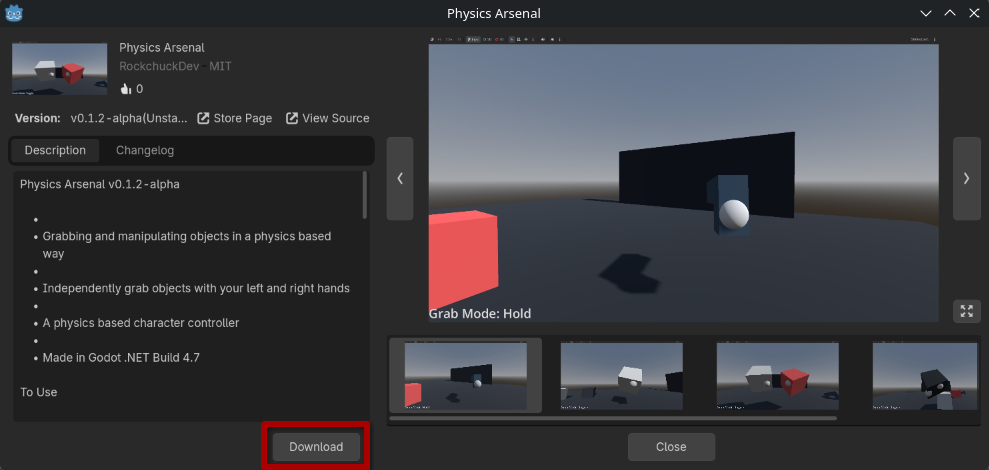
Then “Install” on the next window that opens.
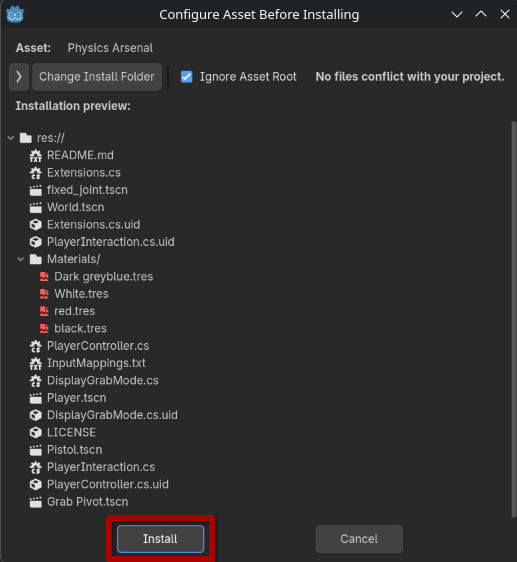
You should get a message that says “Asset “Physics Arsenal” was installed successfully!” Click “OK” to close the message.
Create C# solution
If this is a brand new Godot project, or a Godot project you have not used C# with, you will need to create a C# solution for this project. To do so, click on the “Project” button at the top left of your Godot editor, then go to “Tools” > “C#” > “Create C# Solution”.
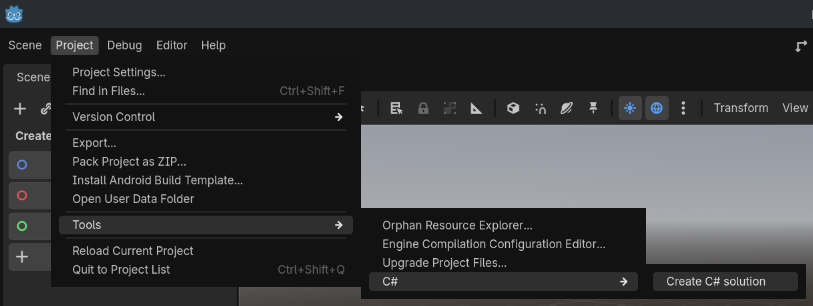
This button bootstraps your Godot project to be able to edit, run, and debug C#. Physics Arsenal will not work without this.
Input Mappings
Physics Arsenal comes with some preset input mappings, but they aren’t automatically imported with the rest of the assets. To set these up, first open up “InputMappings.txt.”
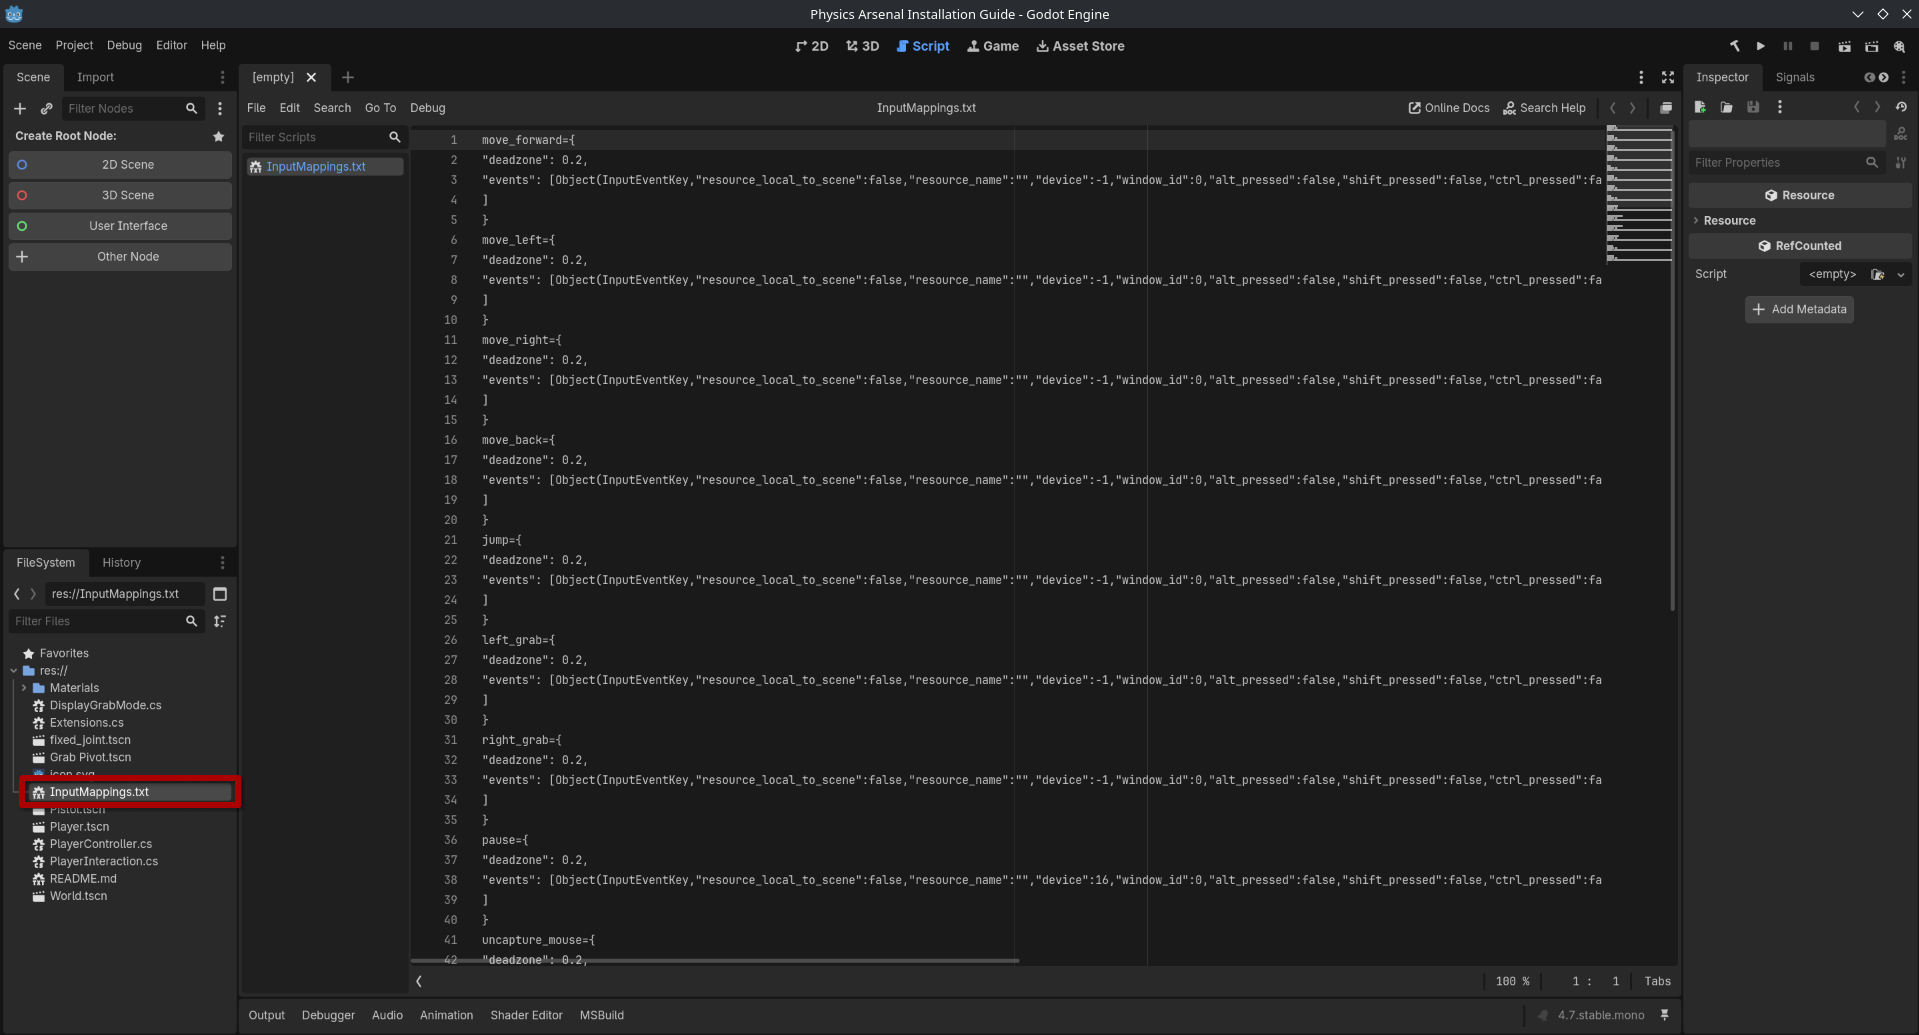
Copy the entire contents of this file, we will be pasting it into the settings file of your project.
Next, right-click on the “res://” folder in your FileSystem tab, and then click on “Open in File Manager.”
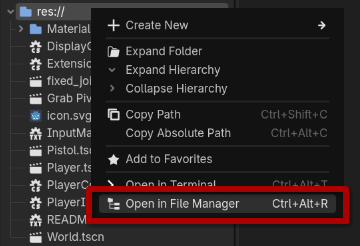
This will open up your Godot project inside of your operating system’s file explorer. Look for a file named “project.godot,” and open it in any text editor. If you are on windows, Notepad works great. If you are on Linux, you probably have your favorite, but Kate is a good option. Within this file, look for a heading that says “[dotnet]”.

Below this section, add an “[input]” heading:
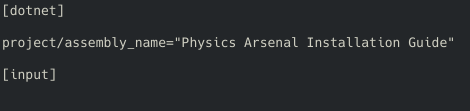
Below the “[input]” heading, paste the contents of “InputMappings.txt” that we copied earlier. Then make sure to save the file, you can press Ctrl + S in most text editors to do this. Then, open up your Godot engine tab, and go to “Project” > “Project Settings.” Then click on “Input Map.”
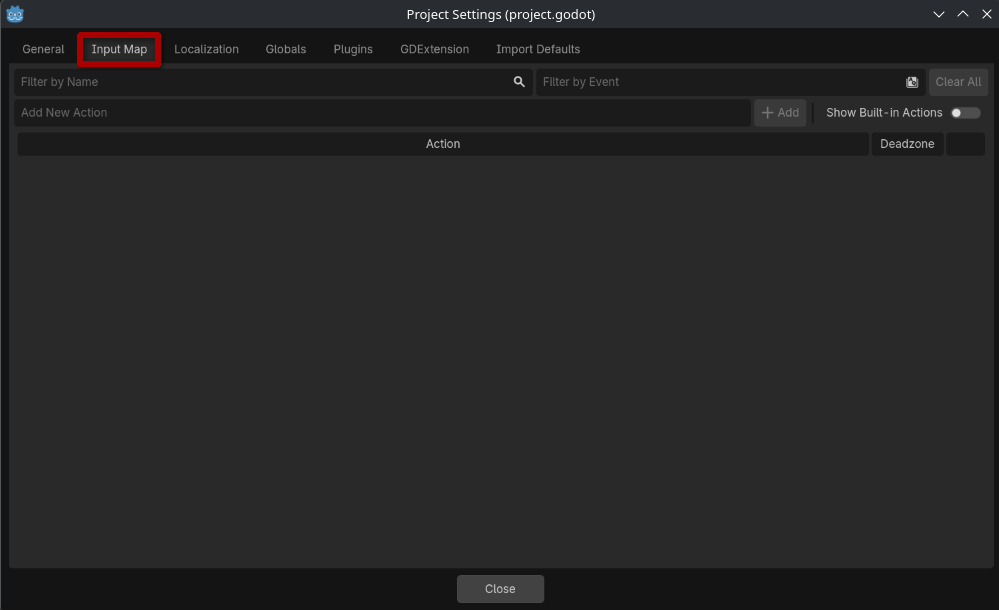
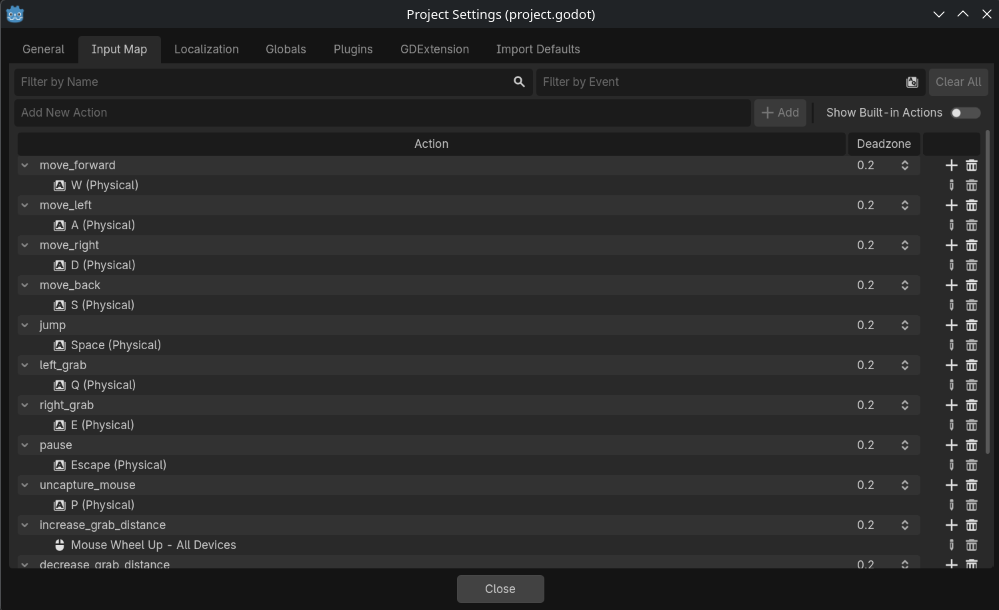
At first, nothing will show up. To get all of the input mappings to load, just add a new action to the list. If you have done everything correctly, all the input mappings should show up:
Autoloads
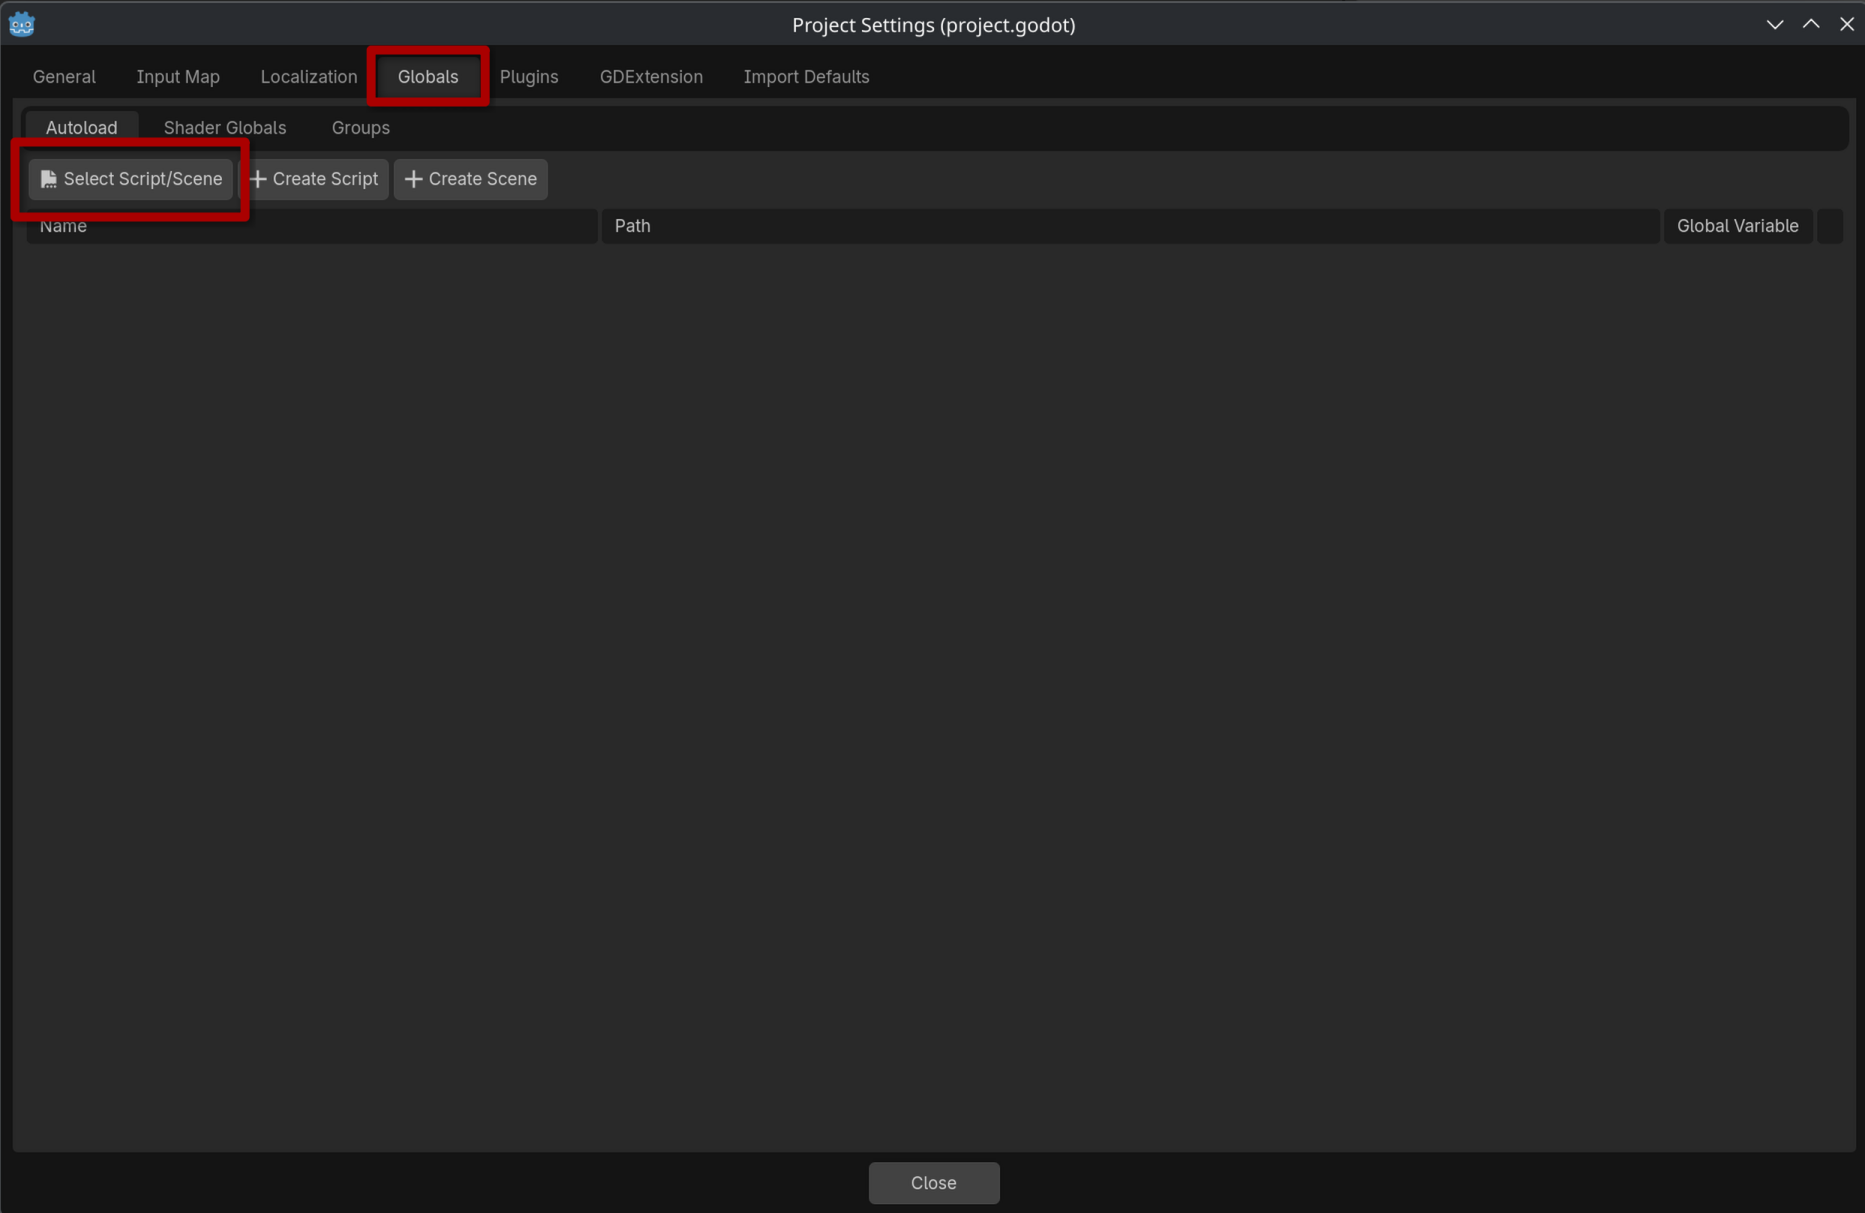
There are two things you need to add to your project autoloads, ParticleManager.cs and CrosshairManager.tscn. To do this, open Project Settings, go to the “Globals” tab, and then press “Select Script/Scene.”
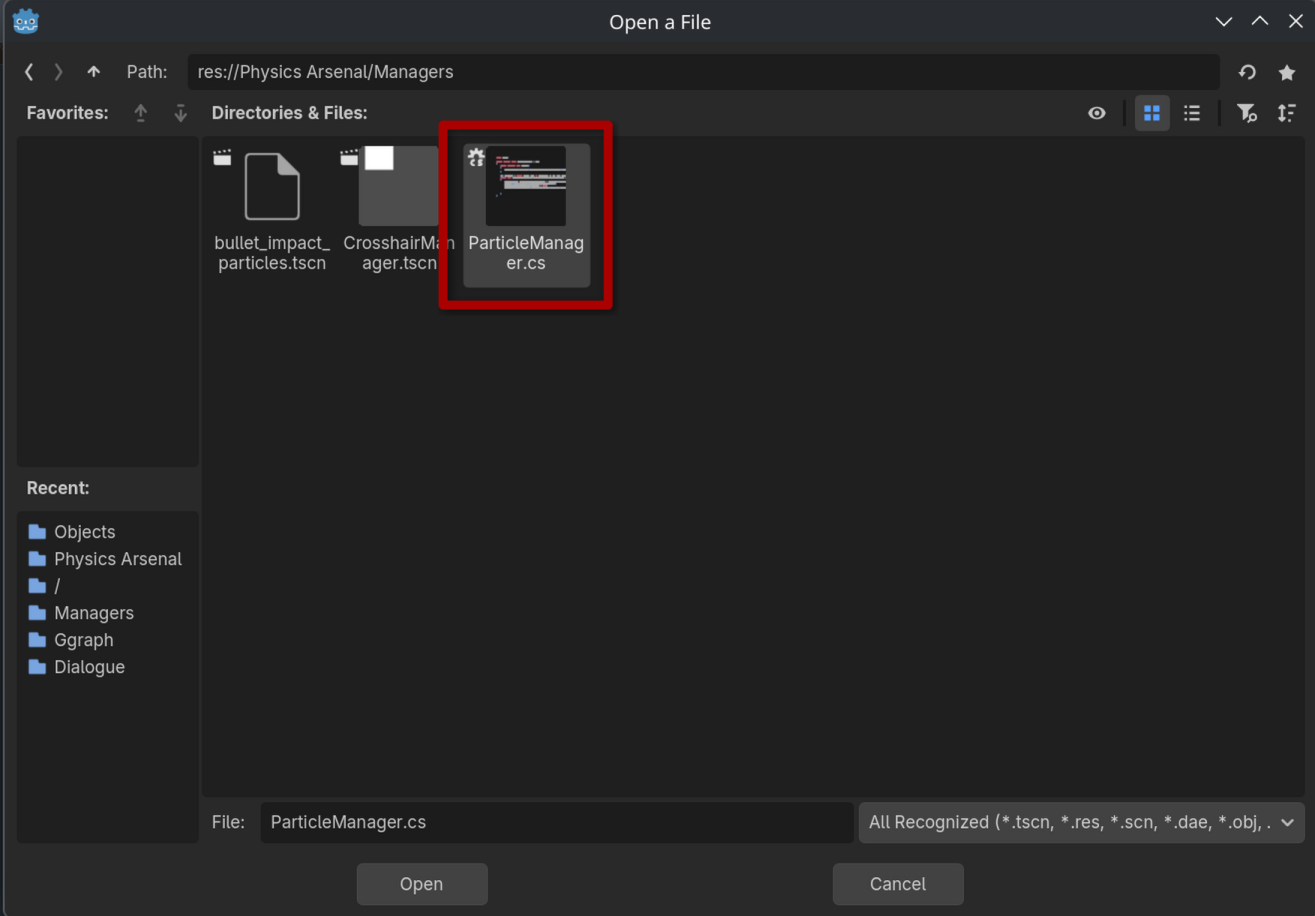
From there, navigate to the provided “Managers” folder, and select “ParticleManager.cs.”
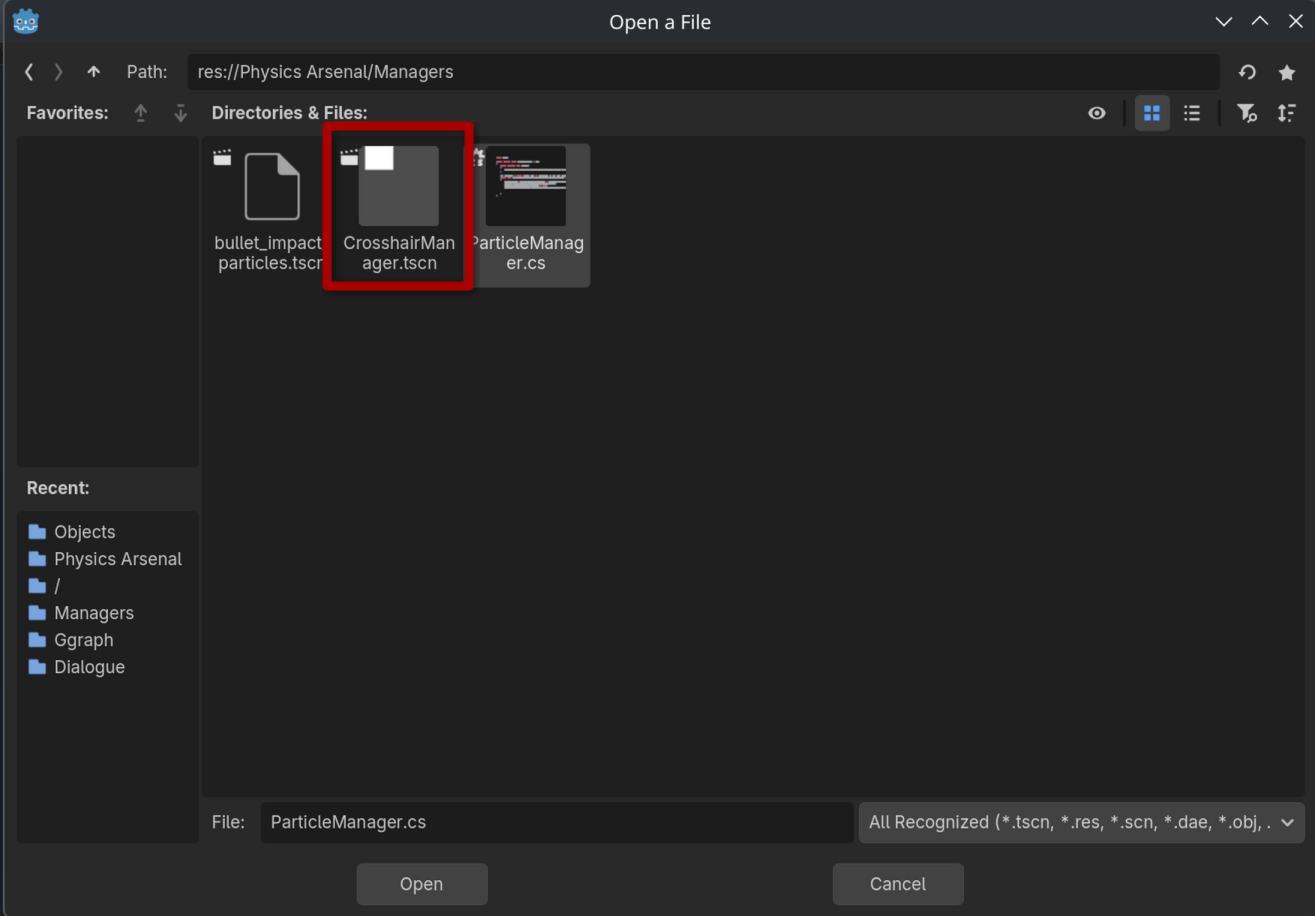
Then, do the same thing for CrosshairManager.tscn.
Congratulations! Your project is set up and ready to use Physics Arsenal! I recommend you check out Quickstart to get familiar with Physics Arsenal, and Default Controls to see the included set of controls. Good luck on whatever you make next!
Last updated: 08-15-2026 23:27